
FileZilla Setup and Usage
FileZilla is a free, open-source SFTP client used to securely transfer files between your computer and a remote server. It supports drag-and-drop uploads, connection management, and large file transfers across Windows, macOS, and Linux.
Downloading and Installing
Section titled “Downloading and Installing”- Navigate to FileZilla download page here.
- Download the latest version for your OS, the name should be something like:
FileZilla_x.x.x_win64-setup.exe - Run the downloaded file
- If prompted, click
Yeson the User Account Control prompt. - Read and agree with the license agreement
- Select who you would like FileZilla to be installed for and click next.
- Select which components you want. Generally, the default selection is okay. If you would like a FileZilla icon on your desktop, select this option.
- Choose a folder to install FileZilla to. Changing this is not neccessary
- Once the install is complete, click finish
Using FileZilla
Section titled “Using FileZilla”- Navigate to your server on the panel.
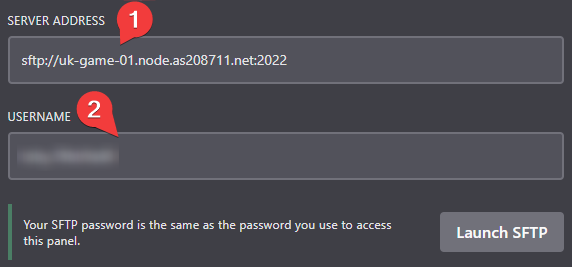
- Go to settings, and view the SFTP details.
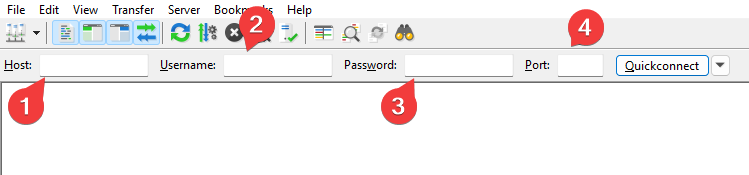
- Fill out the details within FileZilla.
- Copy the server address, and paste it into the
Hostsection on FileZilla. - Copy the username, and paste it into the
Usernamesection on FileZilla. - Enter your password - this is the same password you use to login to the panel
- Leave the port blank - this will be filled in automatically
- Copy the server address, and paste it into the
- Click on quickconnect. You should now be connected to your server. The remote server files should be shown on the right-hand side.